Pick and Place Machine (NeoDen YY1)
The NeoDen YY1 places surface-mount components onto a circuit board for you. Give it a placement file from your PCB design software and load your parts into its tape feeders, and its vacuum nozzle picks up each component and sets it at the exact coordinates from your design — far faster and steadier than tweezers. It’s the middle step of PCB assembly: after solder paste is stenciled onto the board and before the reflow oven melts the paste to lock everything in place. It’s built for prototypes, class projects, and small research batches on boards up to 315 mm × 350 mm. If you’re not sure this is the right machine for your project, see Which Machine?.
WARNING
A trained staff member must be present whenever this machine is in use.
WARNING
Keep hands clear whenever the machine is moving. The placement head moves quickly across the bed and can change direction without warning.
WARNING
Do not bypass covers or reach into the machine during an active job. Load boards, reels, and the SD card only while the machine is idle.
Before you start
Section titled “Before you start”- Your board must already have lead-free solder paste applied.
- Your board must fit within 315 mm × 350 mm.
- Bring your placement file as a YY1-compatible CSV (see YY1 CSV format) and copy it to an SD card.
- Every component in your file must be loaded in the feeder slot the file says it’s in. The feeder slot chart lists which parts are preloaded where and which slots are free for your own reels.
- No special PPE is needed — regular clothes are fine.
Machine overview
Section titled “Machine overview”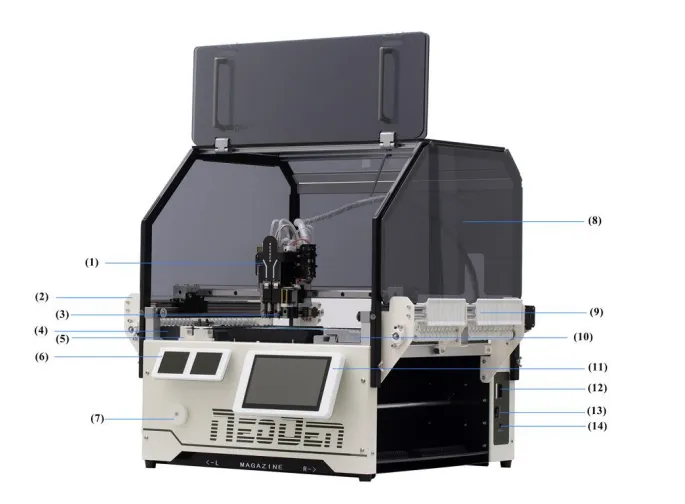
- Placement head: Moves in X/Y to pick and place components.
- Left peeler: Removes cover tape from feeder strips.
- Nozzle: Vacuum pickup tip for component handling.
- Left feeder bank: Reel slots for component tapes.
- ANC nozzle station: Automatic nozzle storage and exchange area.
- Camera displays: Upward/downward vision feedback for alignment.
- Peeler holder: Supports and guides peeled tape path.
- Safety cover: Shields operator from moving mechanism.
- Right peeler: Cover tape removal on the right feeder side.
- Sticker feeder: Supports short cut strips instead of full reels.
- Touchscreen: Main machine UI for file loading and job control.
- SD card slot: File transfer input for YY1 CSV jobs.
- ON/OFF switch: Main power switch.
- DC power input: 24 V power input connector.
Software download
Section titled “Software download”Use the lab YY1 formatter package (the installers are in this folder):
To make your YY1 file:
- In your PCB design software (Fusion 360, KiCad, Altium, EasyEDA and others all work), set the units to mm and export your board’s placement file — also called a pick-and-place or centroid export — as a CSV.
- Download the formatter and run it on your own computer or a lab PC. The link opens a Google Drive folder — open the installer for your operating system, then click the Download icon.
- Drag your CSV into the formatter, then assign each component the feeder slot its parts are loaded in — the feeder slot chart says what is where.
- Export. The formatter saves a
…_yy1.csvfile ready for the machine — copy it onto the SD card.
YY1 CSV format (required)
Section titled “YY1 CSV format (required)”The YY1 does not accept a generic CAD pick-and-place CSV. The CSV must match YY1 structure, including the file header rows, panel/fiducial rows, nozzle-change rows, and full component columns.
NOTE
Export from your EDA tool as CSV with mm units, then run it through the YY1 formatter so the output matches this structure.
Required component columns in the YY1 section are:
- Designator
- Comment
- Footprint
- Mid X(mm)
- Mid Y(mm)
- Rotation
- Head
- FeederNo
- Mount Speed(%)
- Pick Height(mm)
- Place Height(mm)
- Mode
- Skip
Reference structure (from a known working YY1 file):
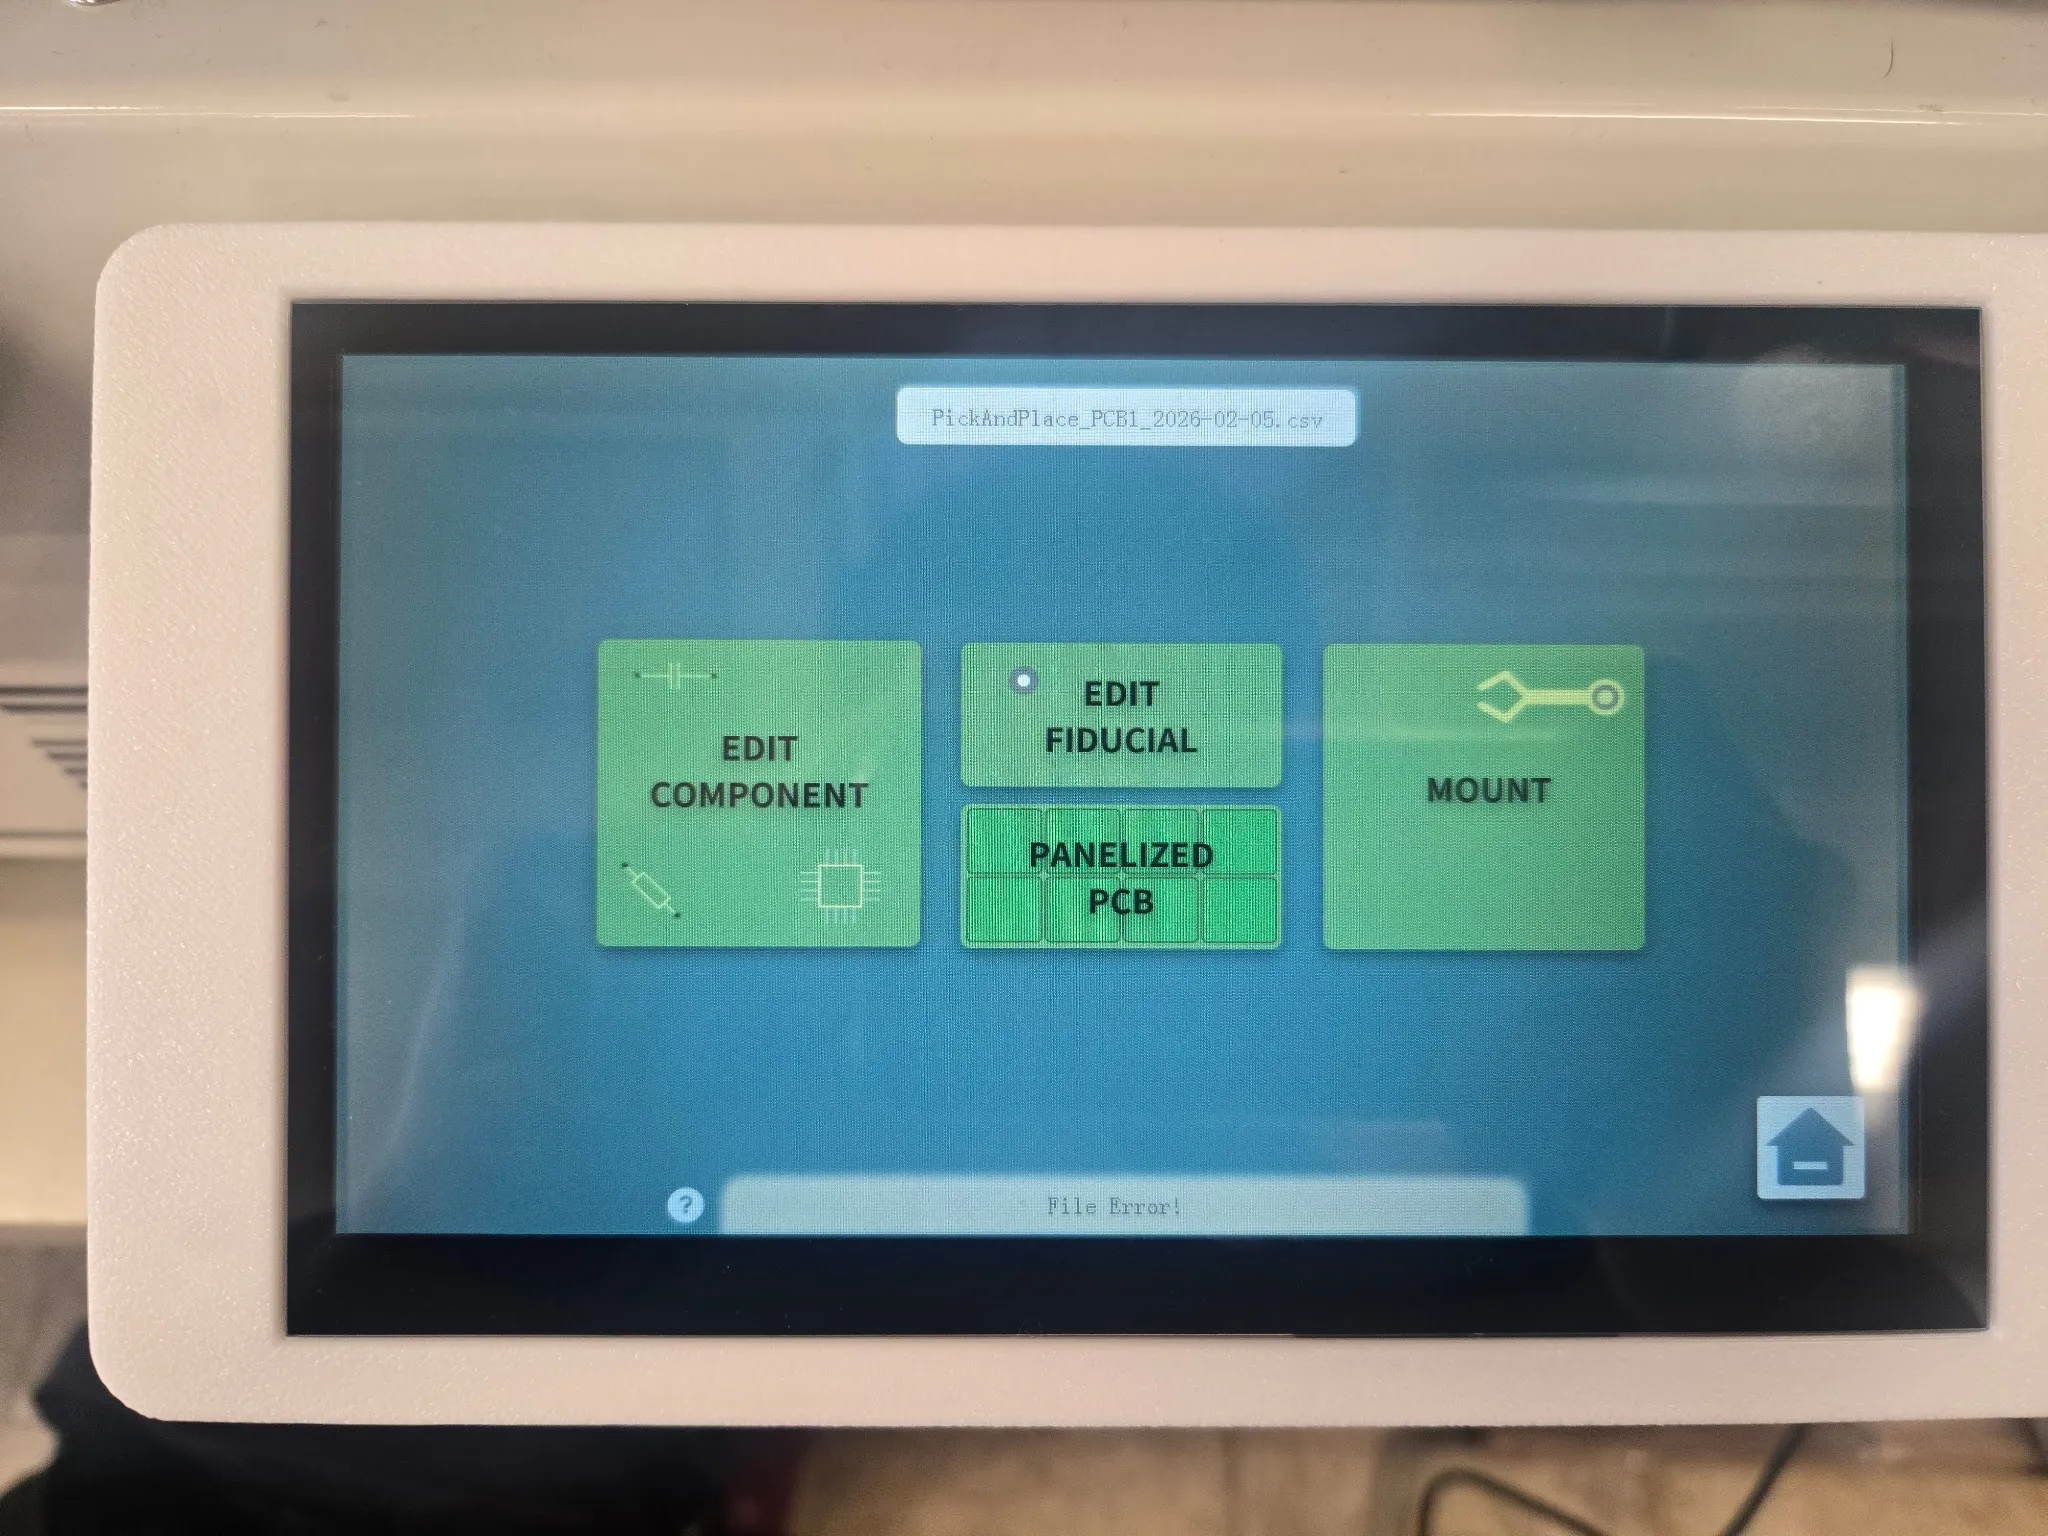
NEODEN,YY1,P&P FILE,,,,,,,,,,,,,,,,,,,,,,,,PanelizedPCB,UnitLength,0,UnitWidth,0,Rows,1,Columns,1,,,,,,,,,,,,,,Fiducial,1-X,0,1-Y,0,OverallOffsetX,0,OverallOffsetY,0,,,,,,,,,,,,,,NozzleChange,OFF,BeforeComponent,2,Head1,Drop,Station1,PickUp,Station3,NozzleChange,OFF,BeforeComponent,1,Head1,Drop,Station3,PickUp,Station1,NozzleChange,OFF,BeforeComponent,1,Head1,Drop,Station1,PickUp,Station1,NozzleChange,OFF,BeforeComponent,1,Head1,Drop,Station1,PickUp,Station1,,,,,,,,,,,,,,Designator,Comment,Footprint,Mid X(mm),Mid Y(mm) ,Rotation,Head ,FeederNo,Mount Speed(%),Pick Height(mm),Place Height(mm),Mode,SkipC1,0.1uF,CAPC3216X135,81.25,68.99,0.00,0,1,100,0.0,0.0,1,0If this structure is not matched, the YY1 can show File Error and refuse to run.
Operating
Section titled “Operating”-
Confirm the machine bed is clear and no leftover components are in the work area.
-
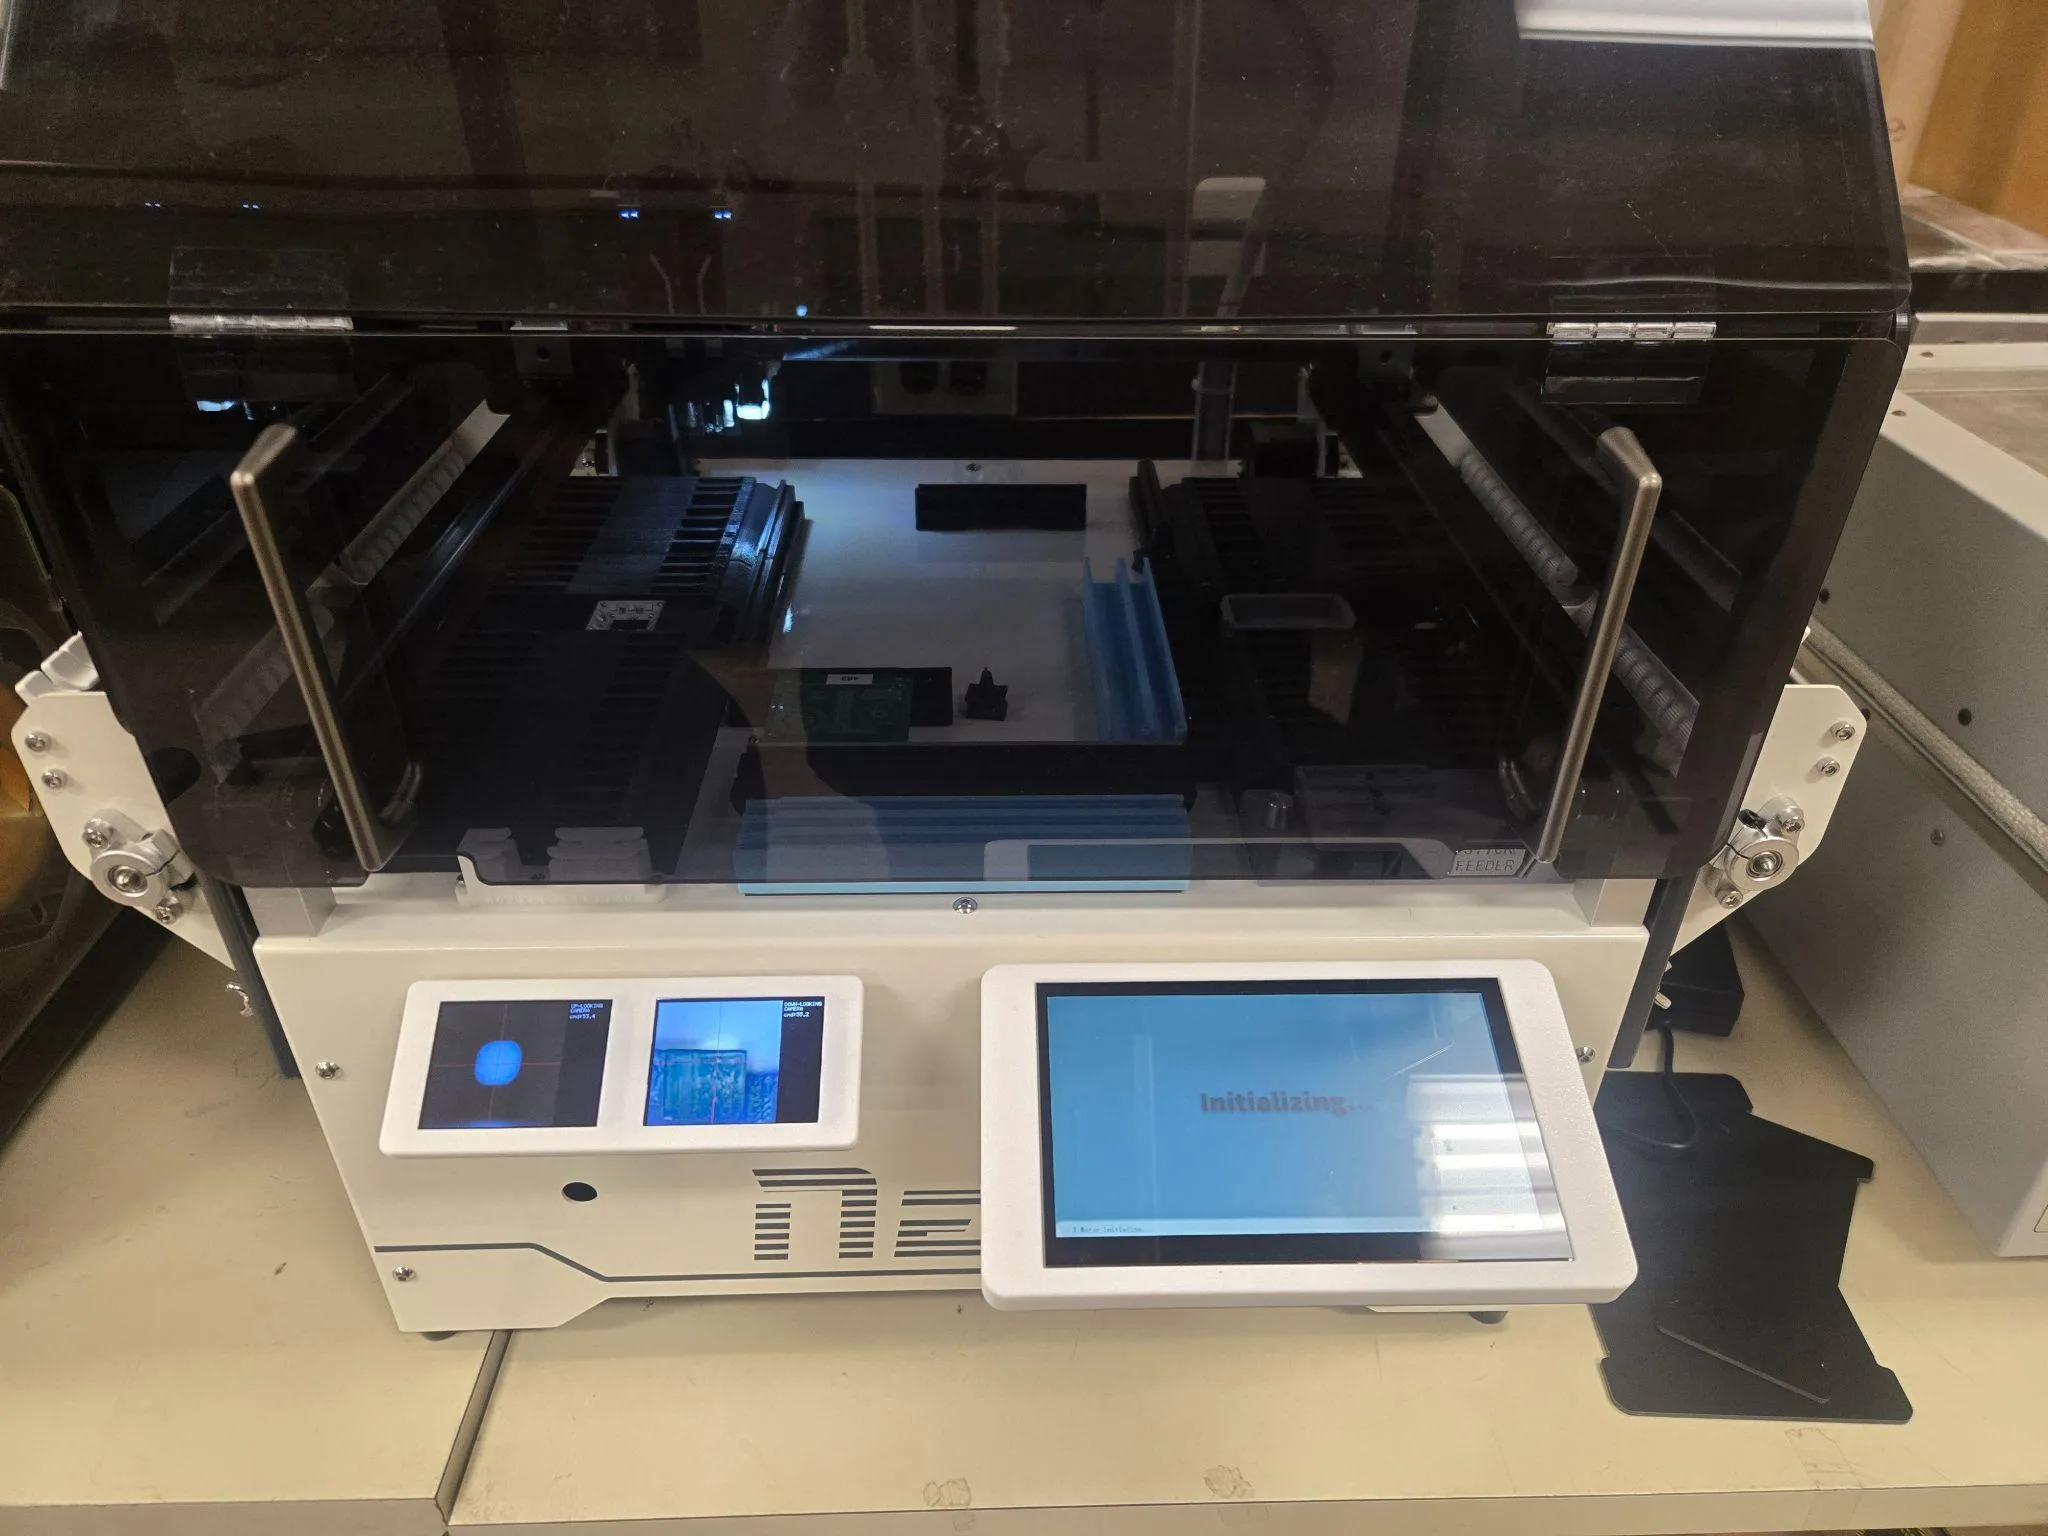
Turn on machine power using the right-side panel switch.
-
Wait for startup to complete.
-
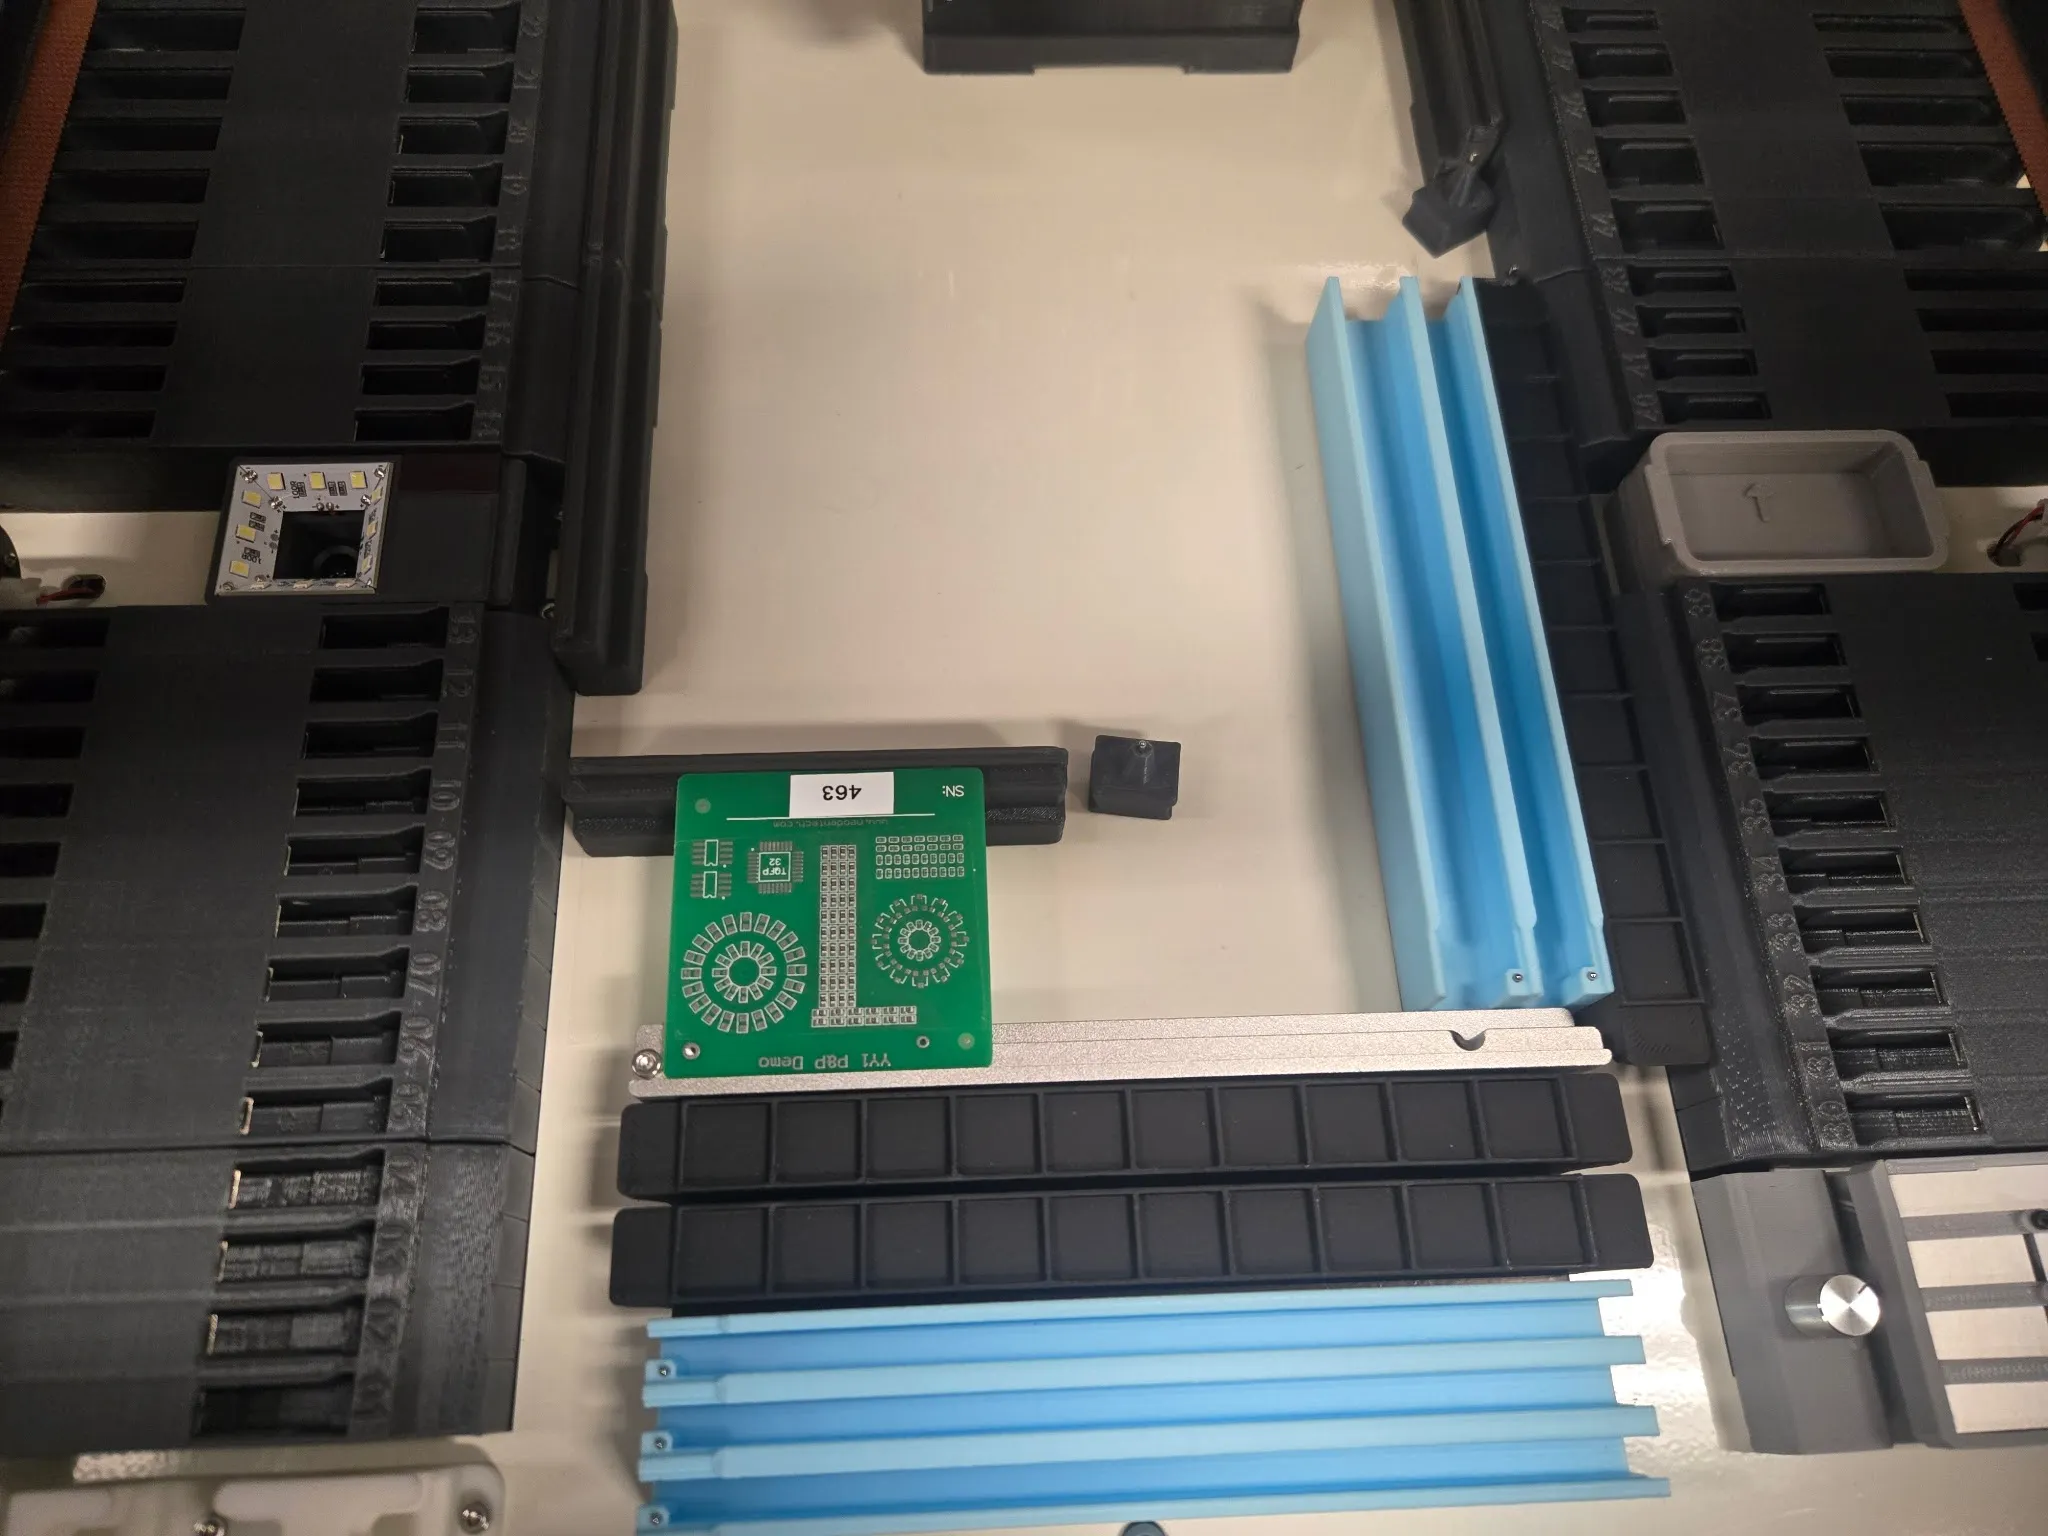
Load any missing reels into free feeder slots and align tape with the feeder rail.
-
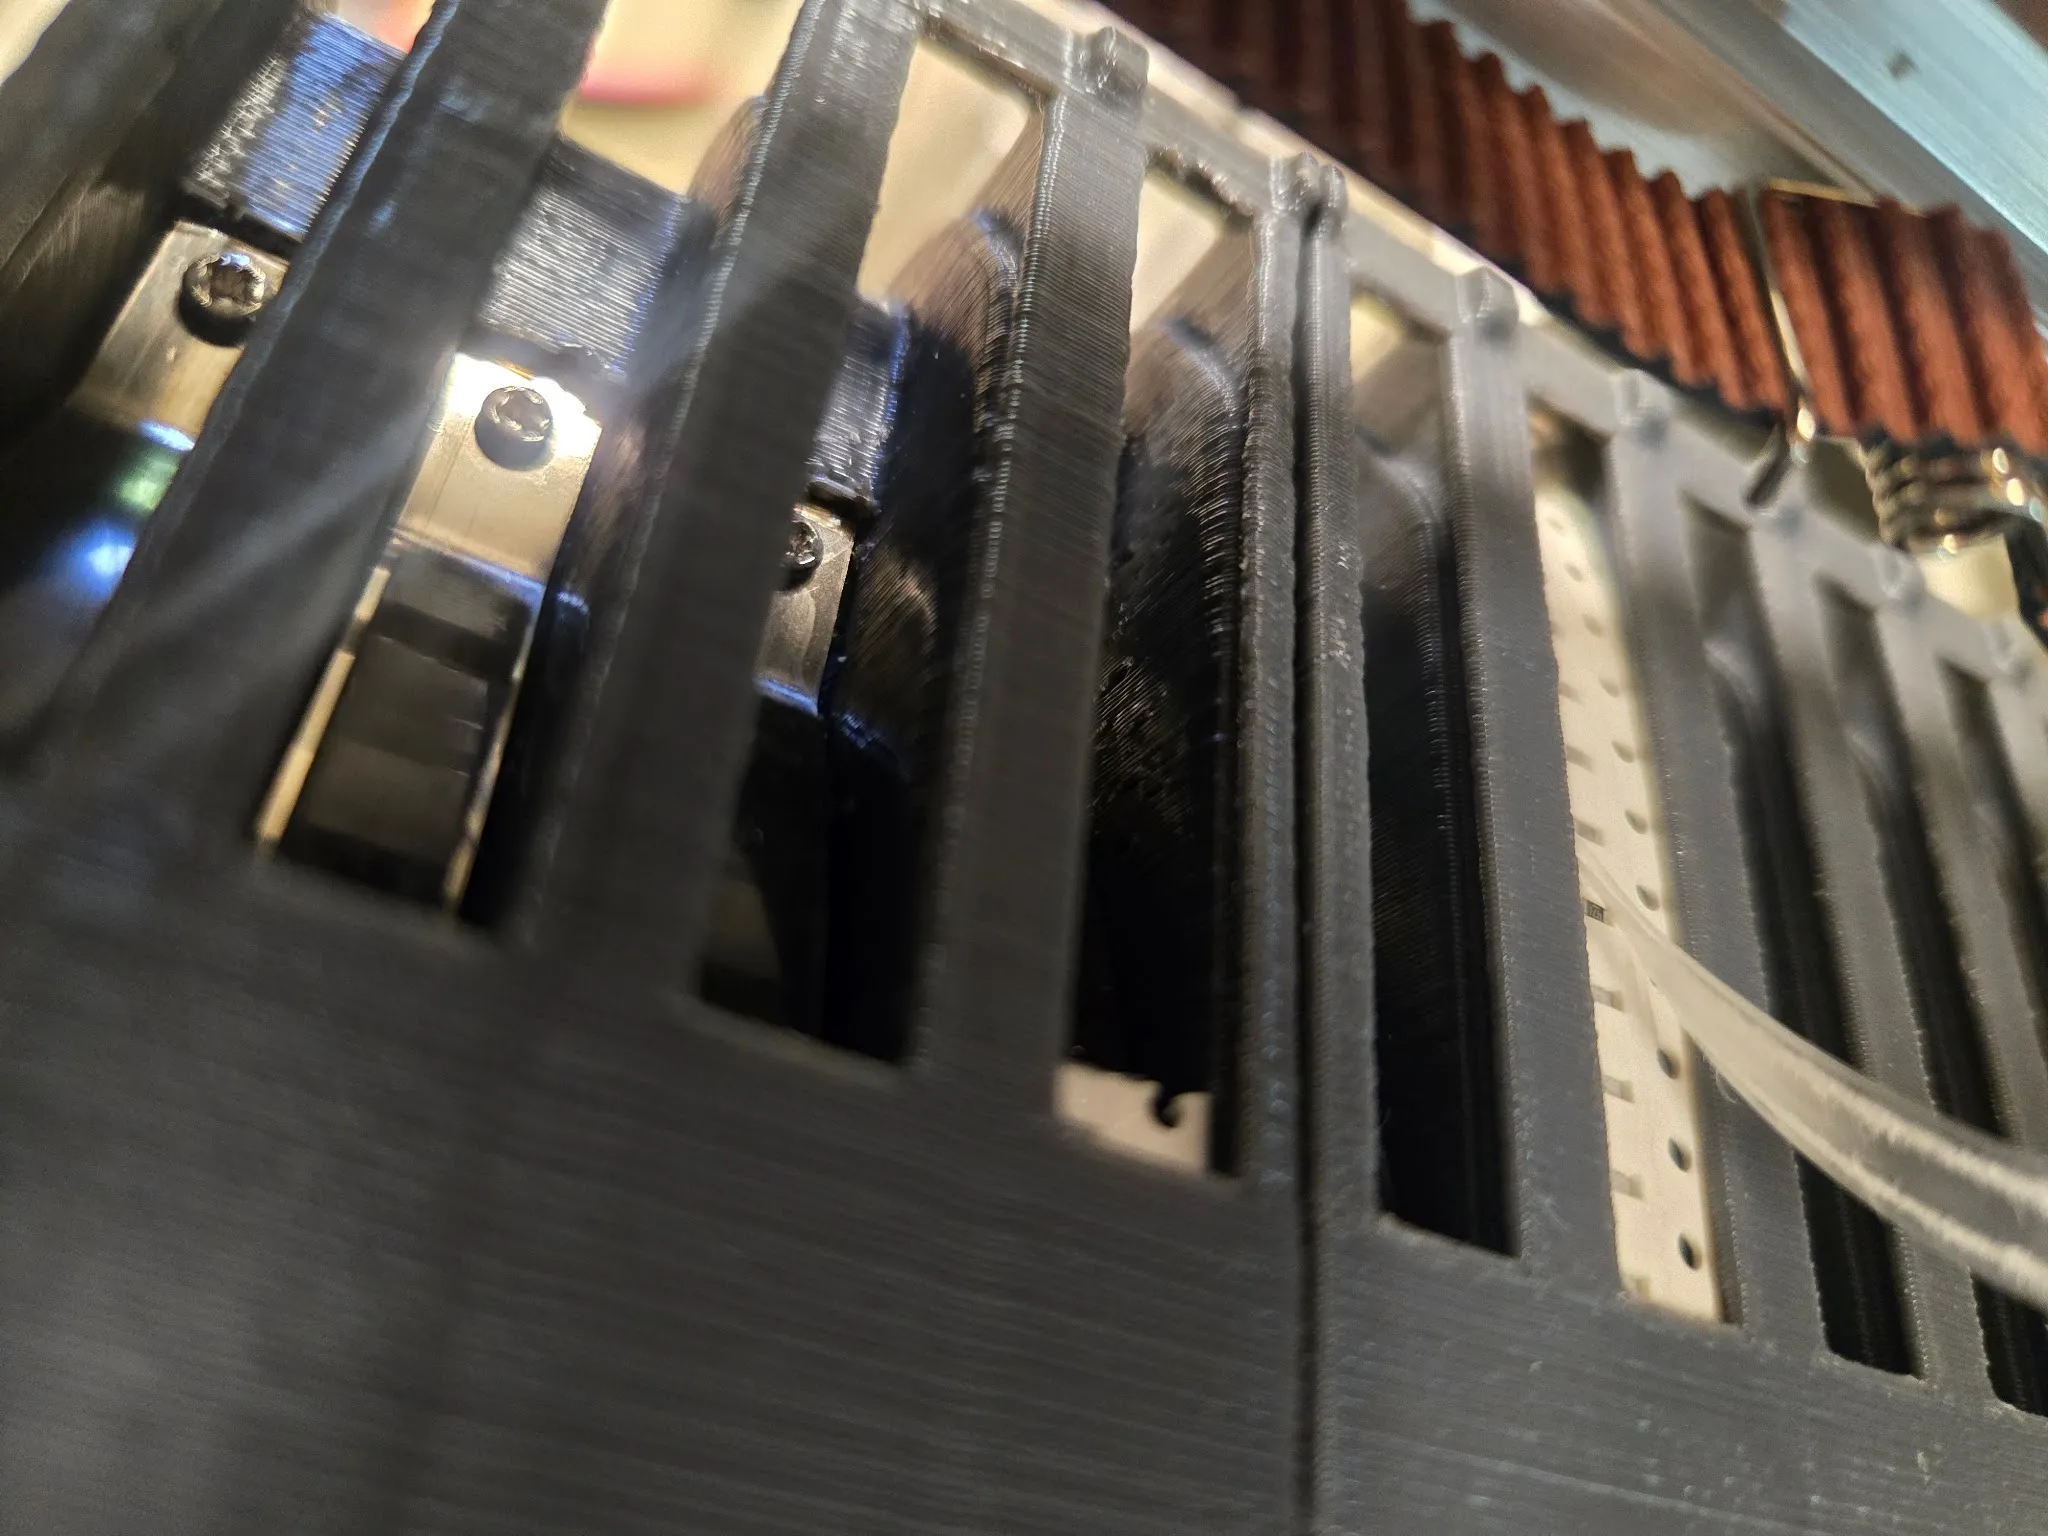
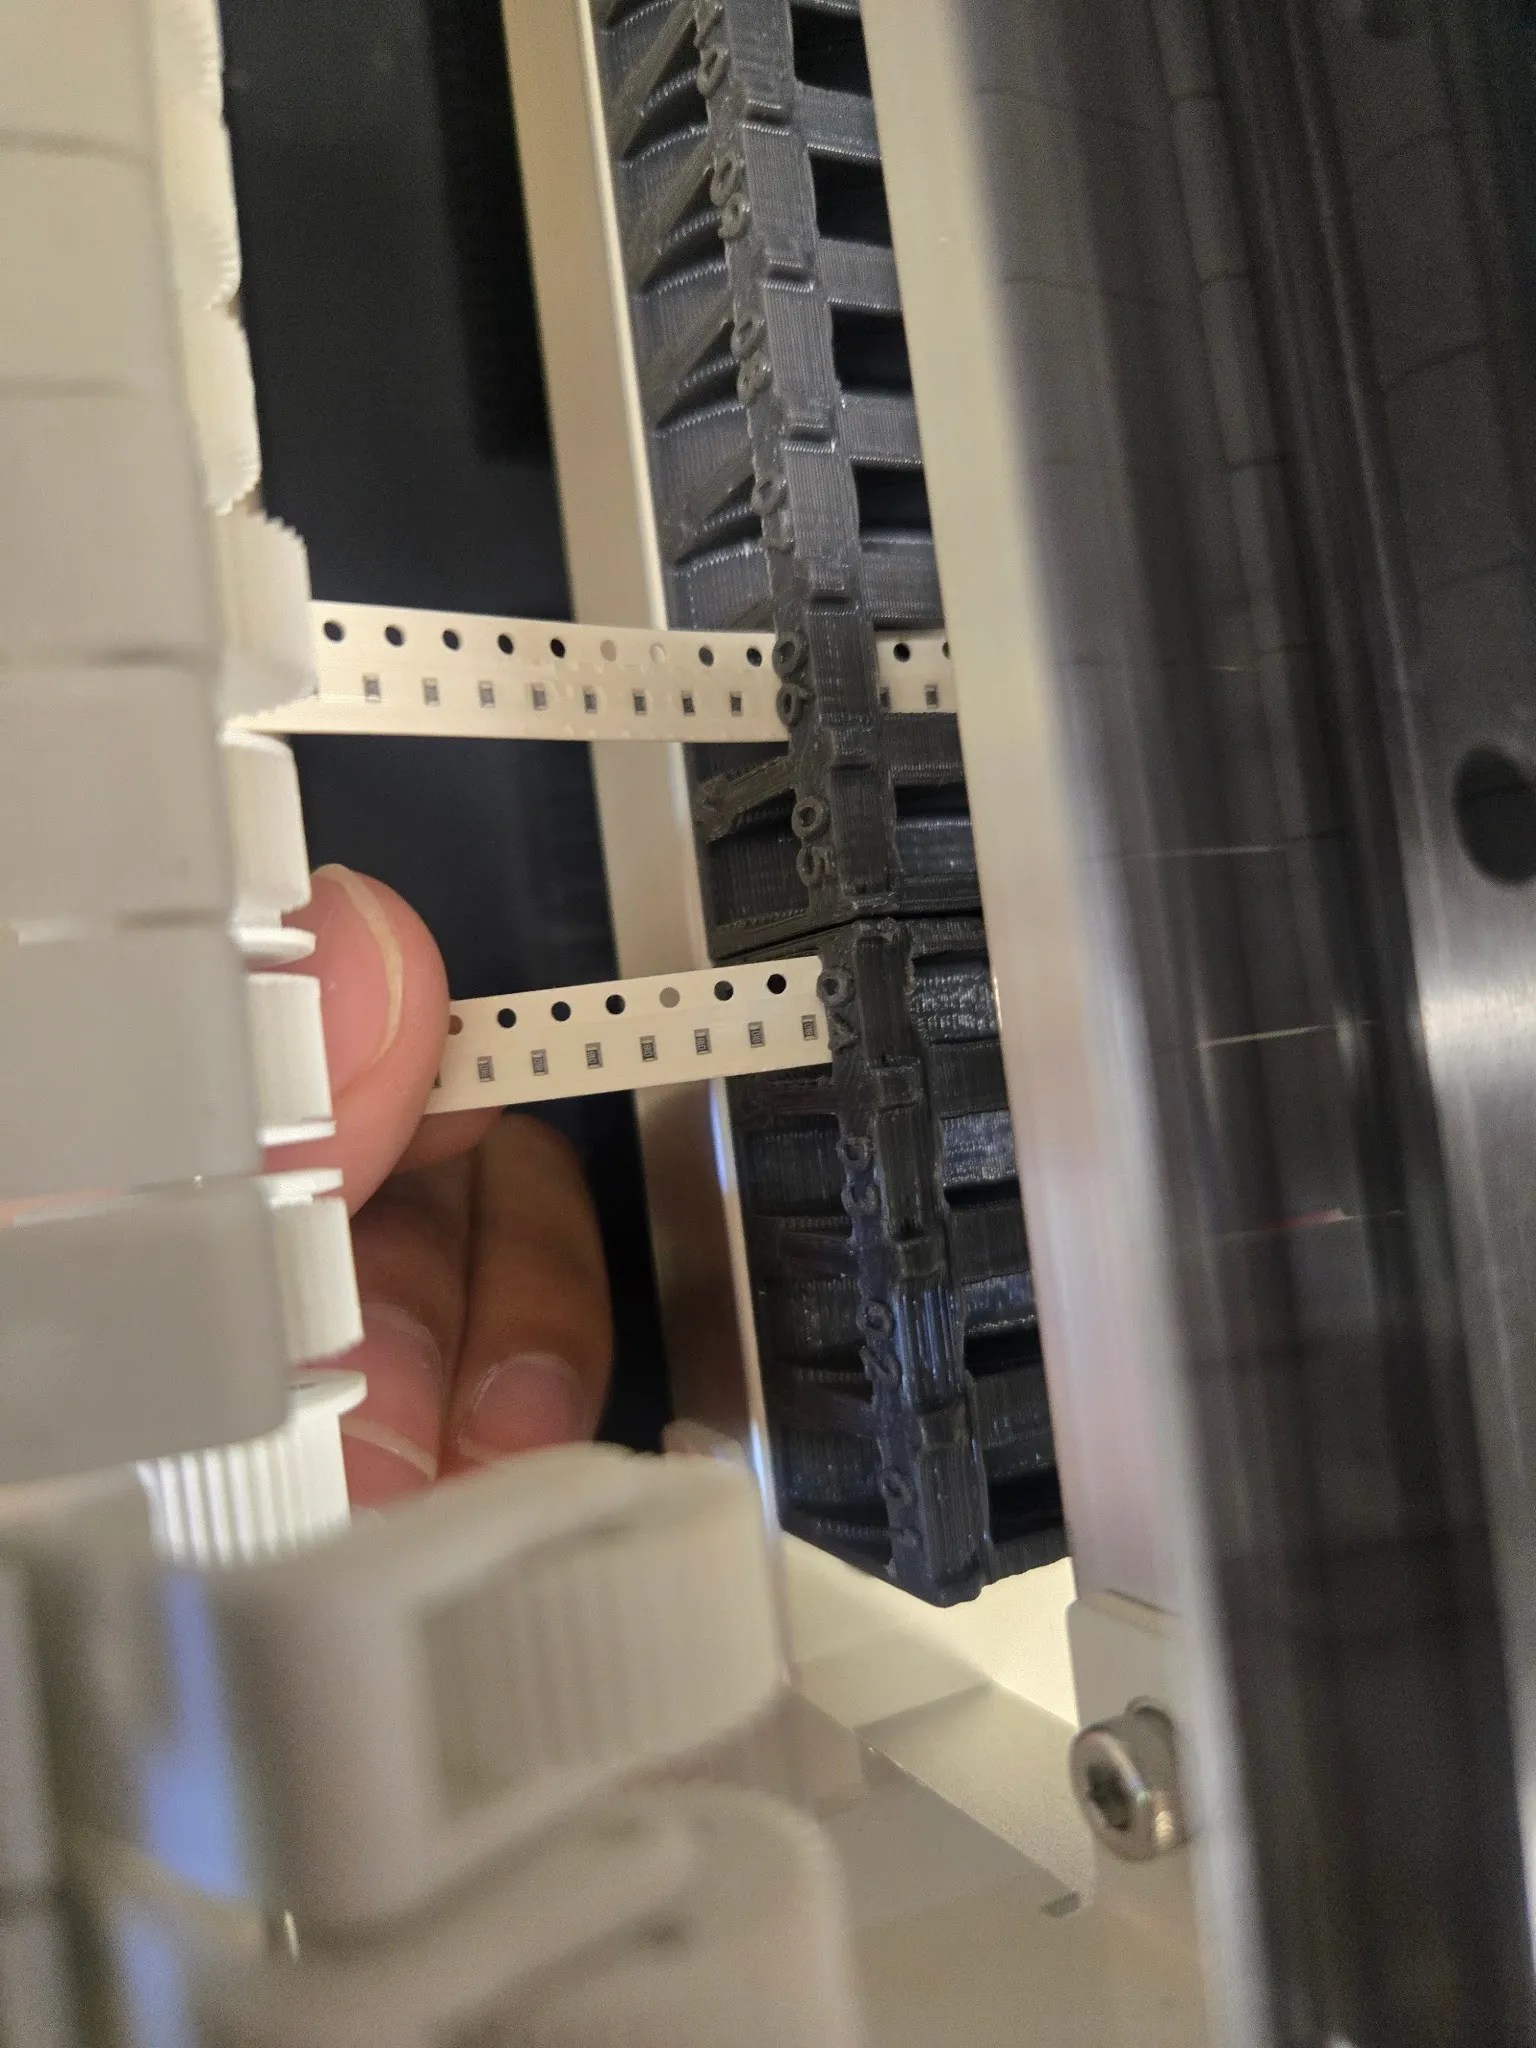
Advance each tape to pickup position using tweezers, aligned with the marked line.
-
Insert the SD card until it clicks. Verify your file appears in the UI.
-
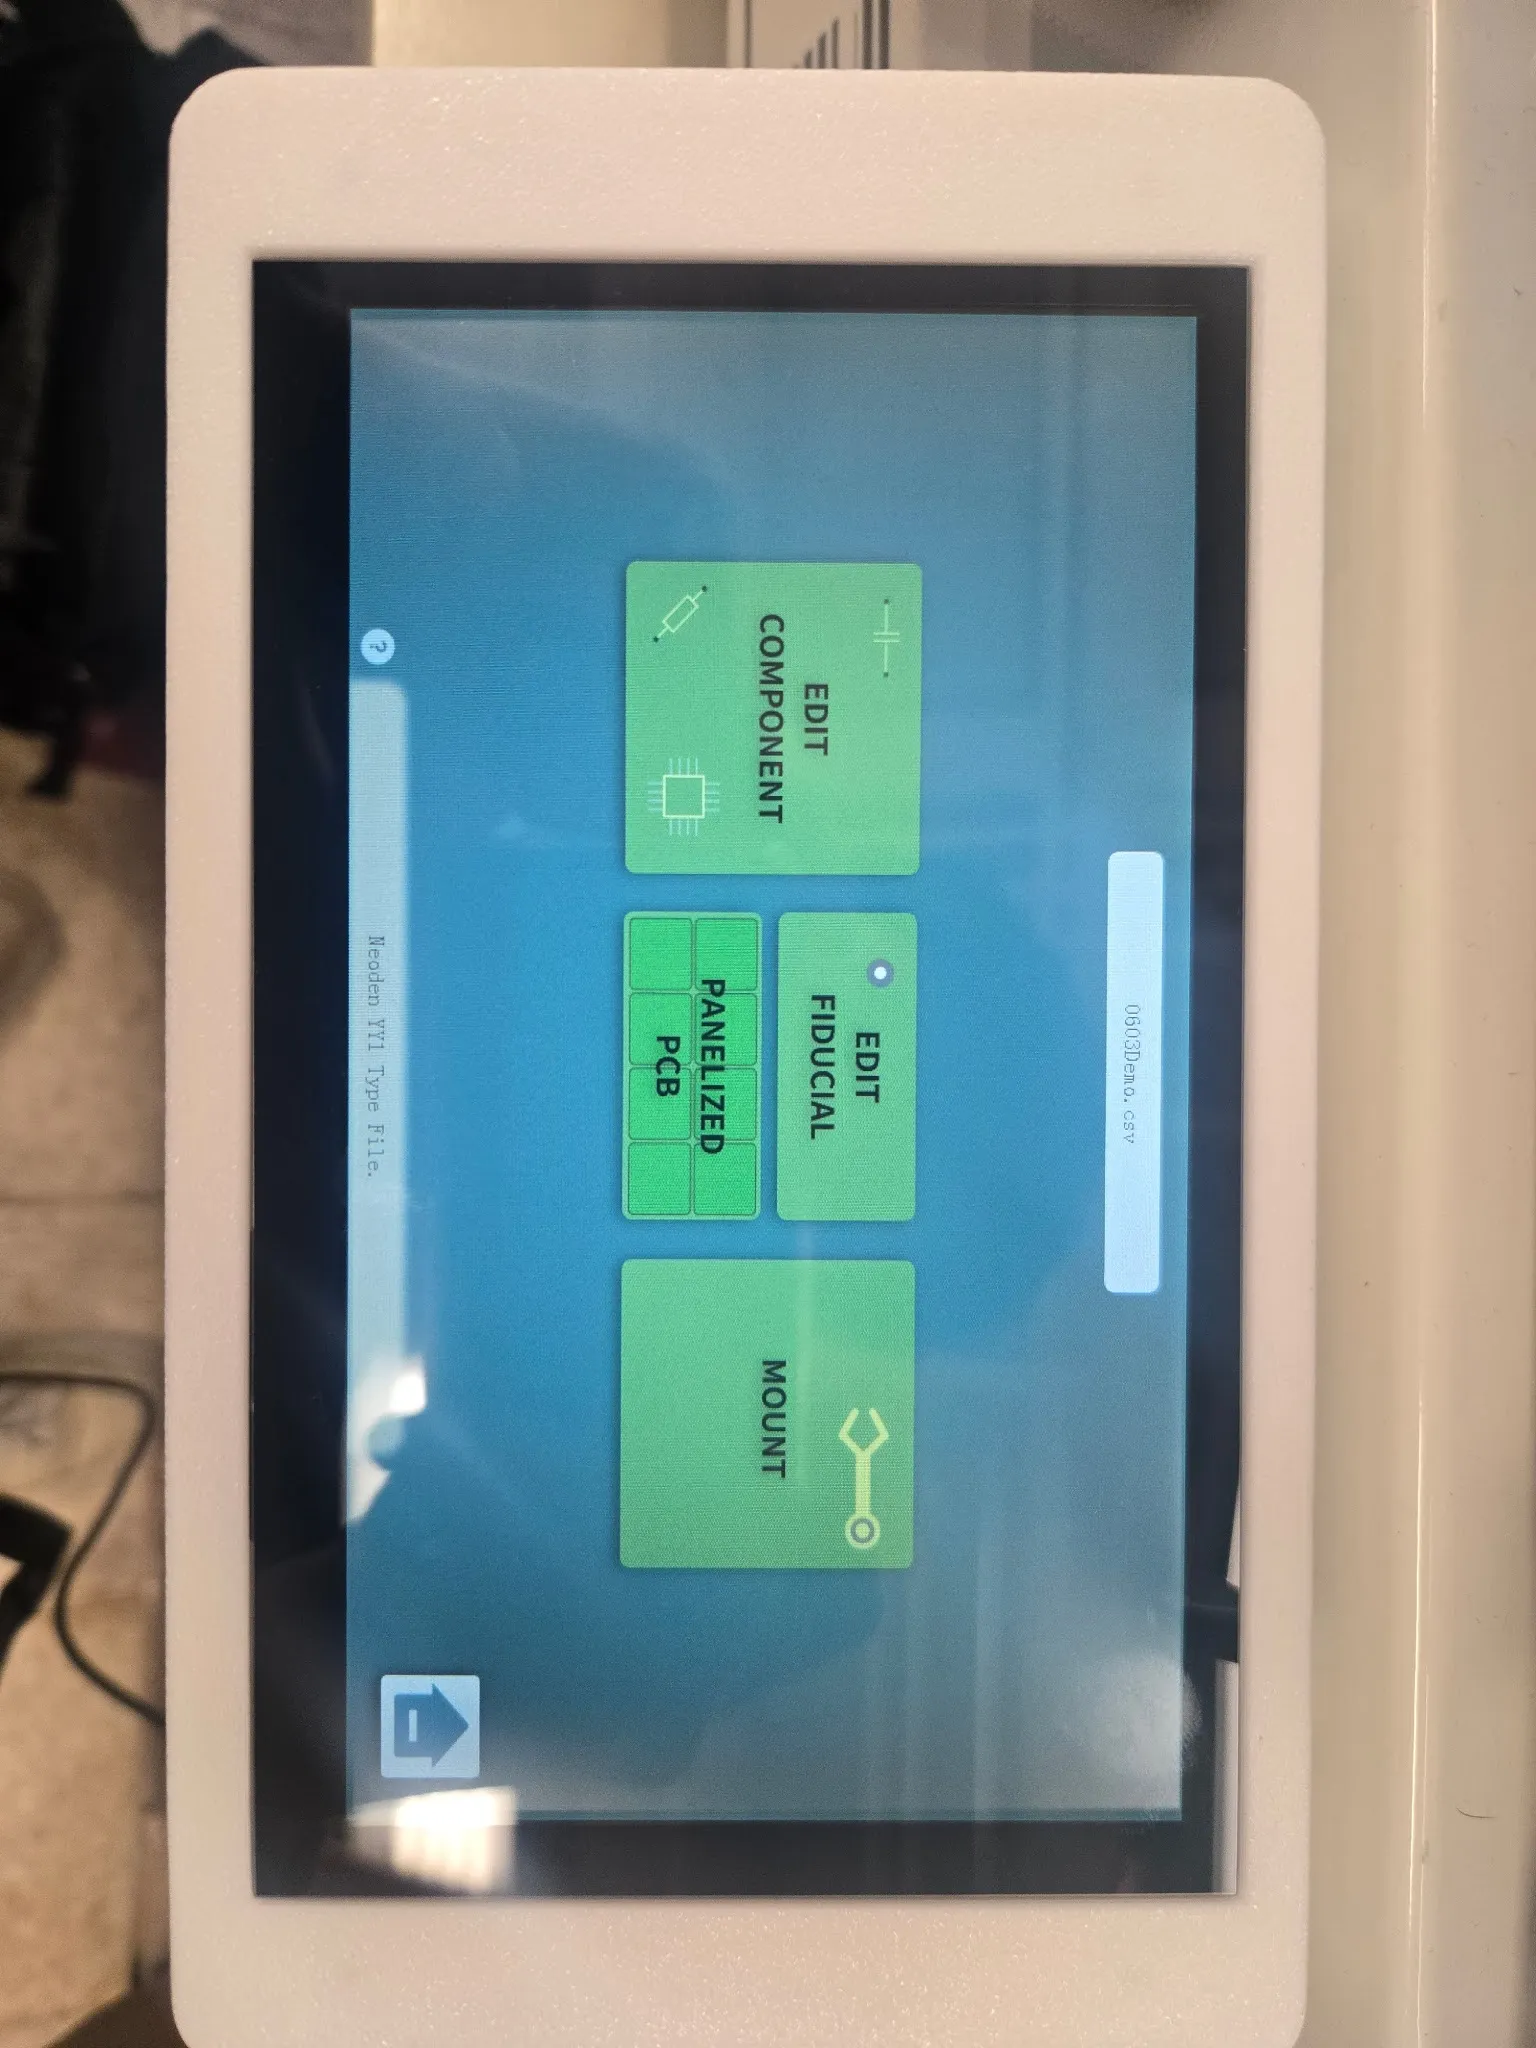
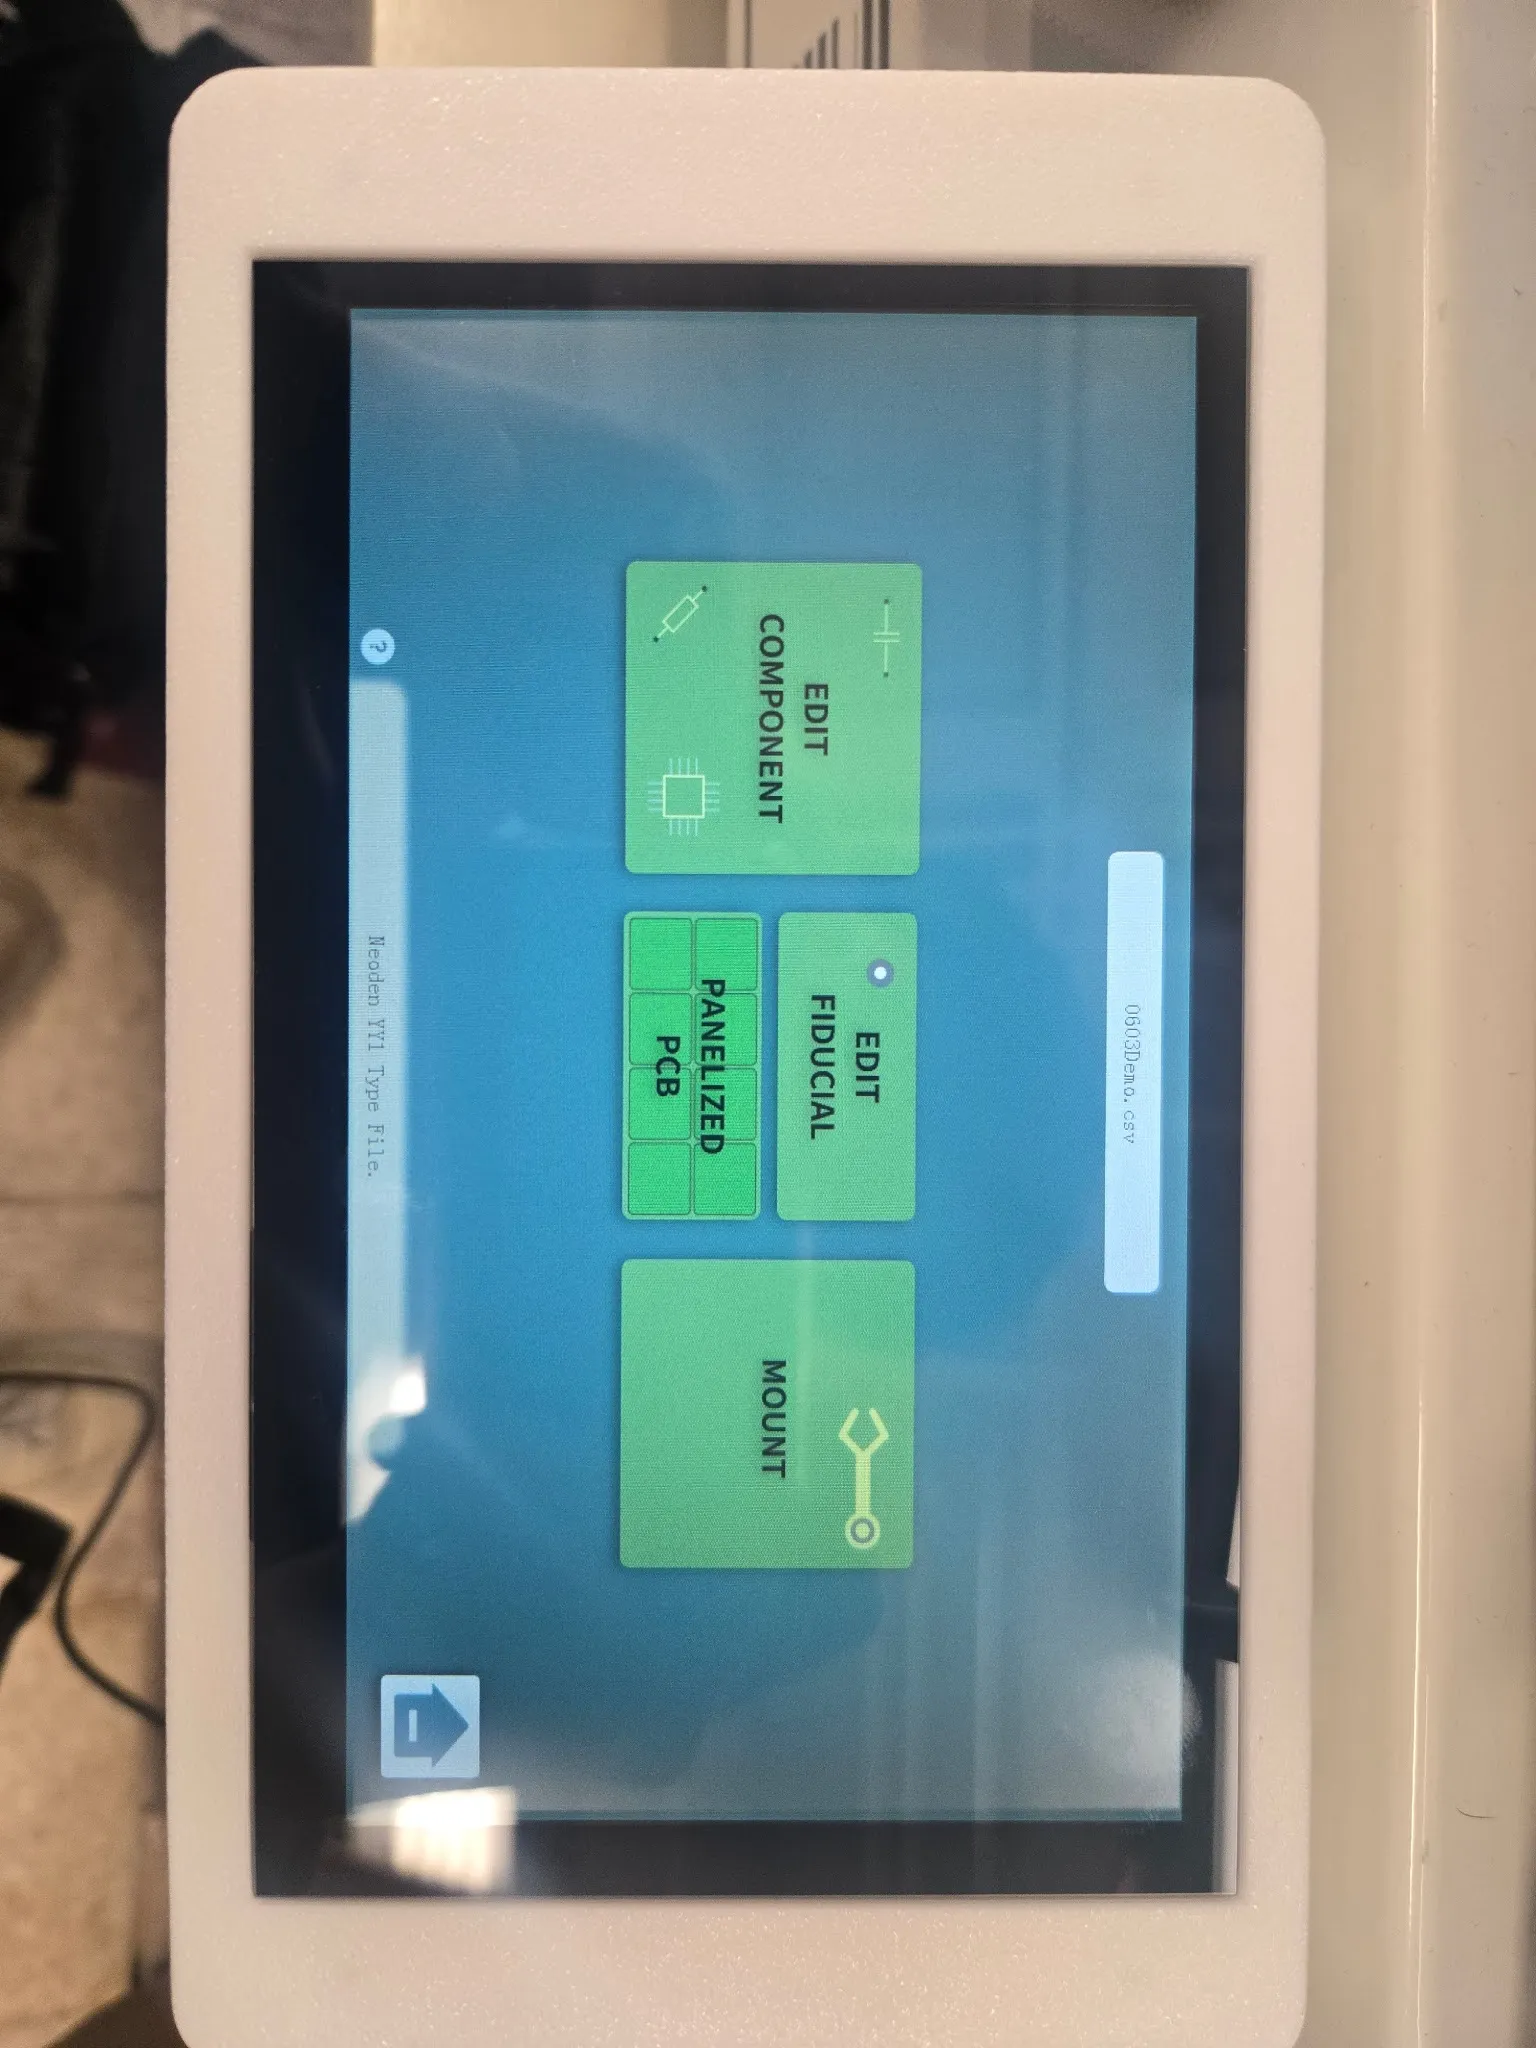
Select the file. A valid file should load as Neoden YY1 Type File and expose editing/mount options.
-
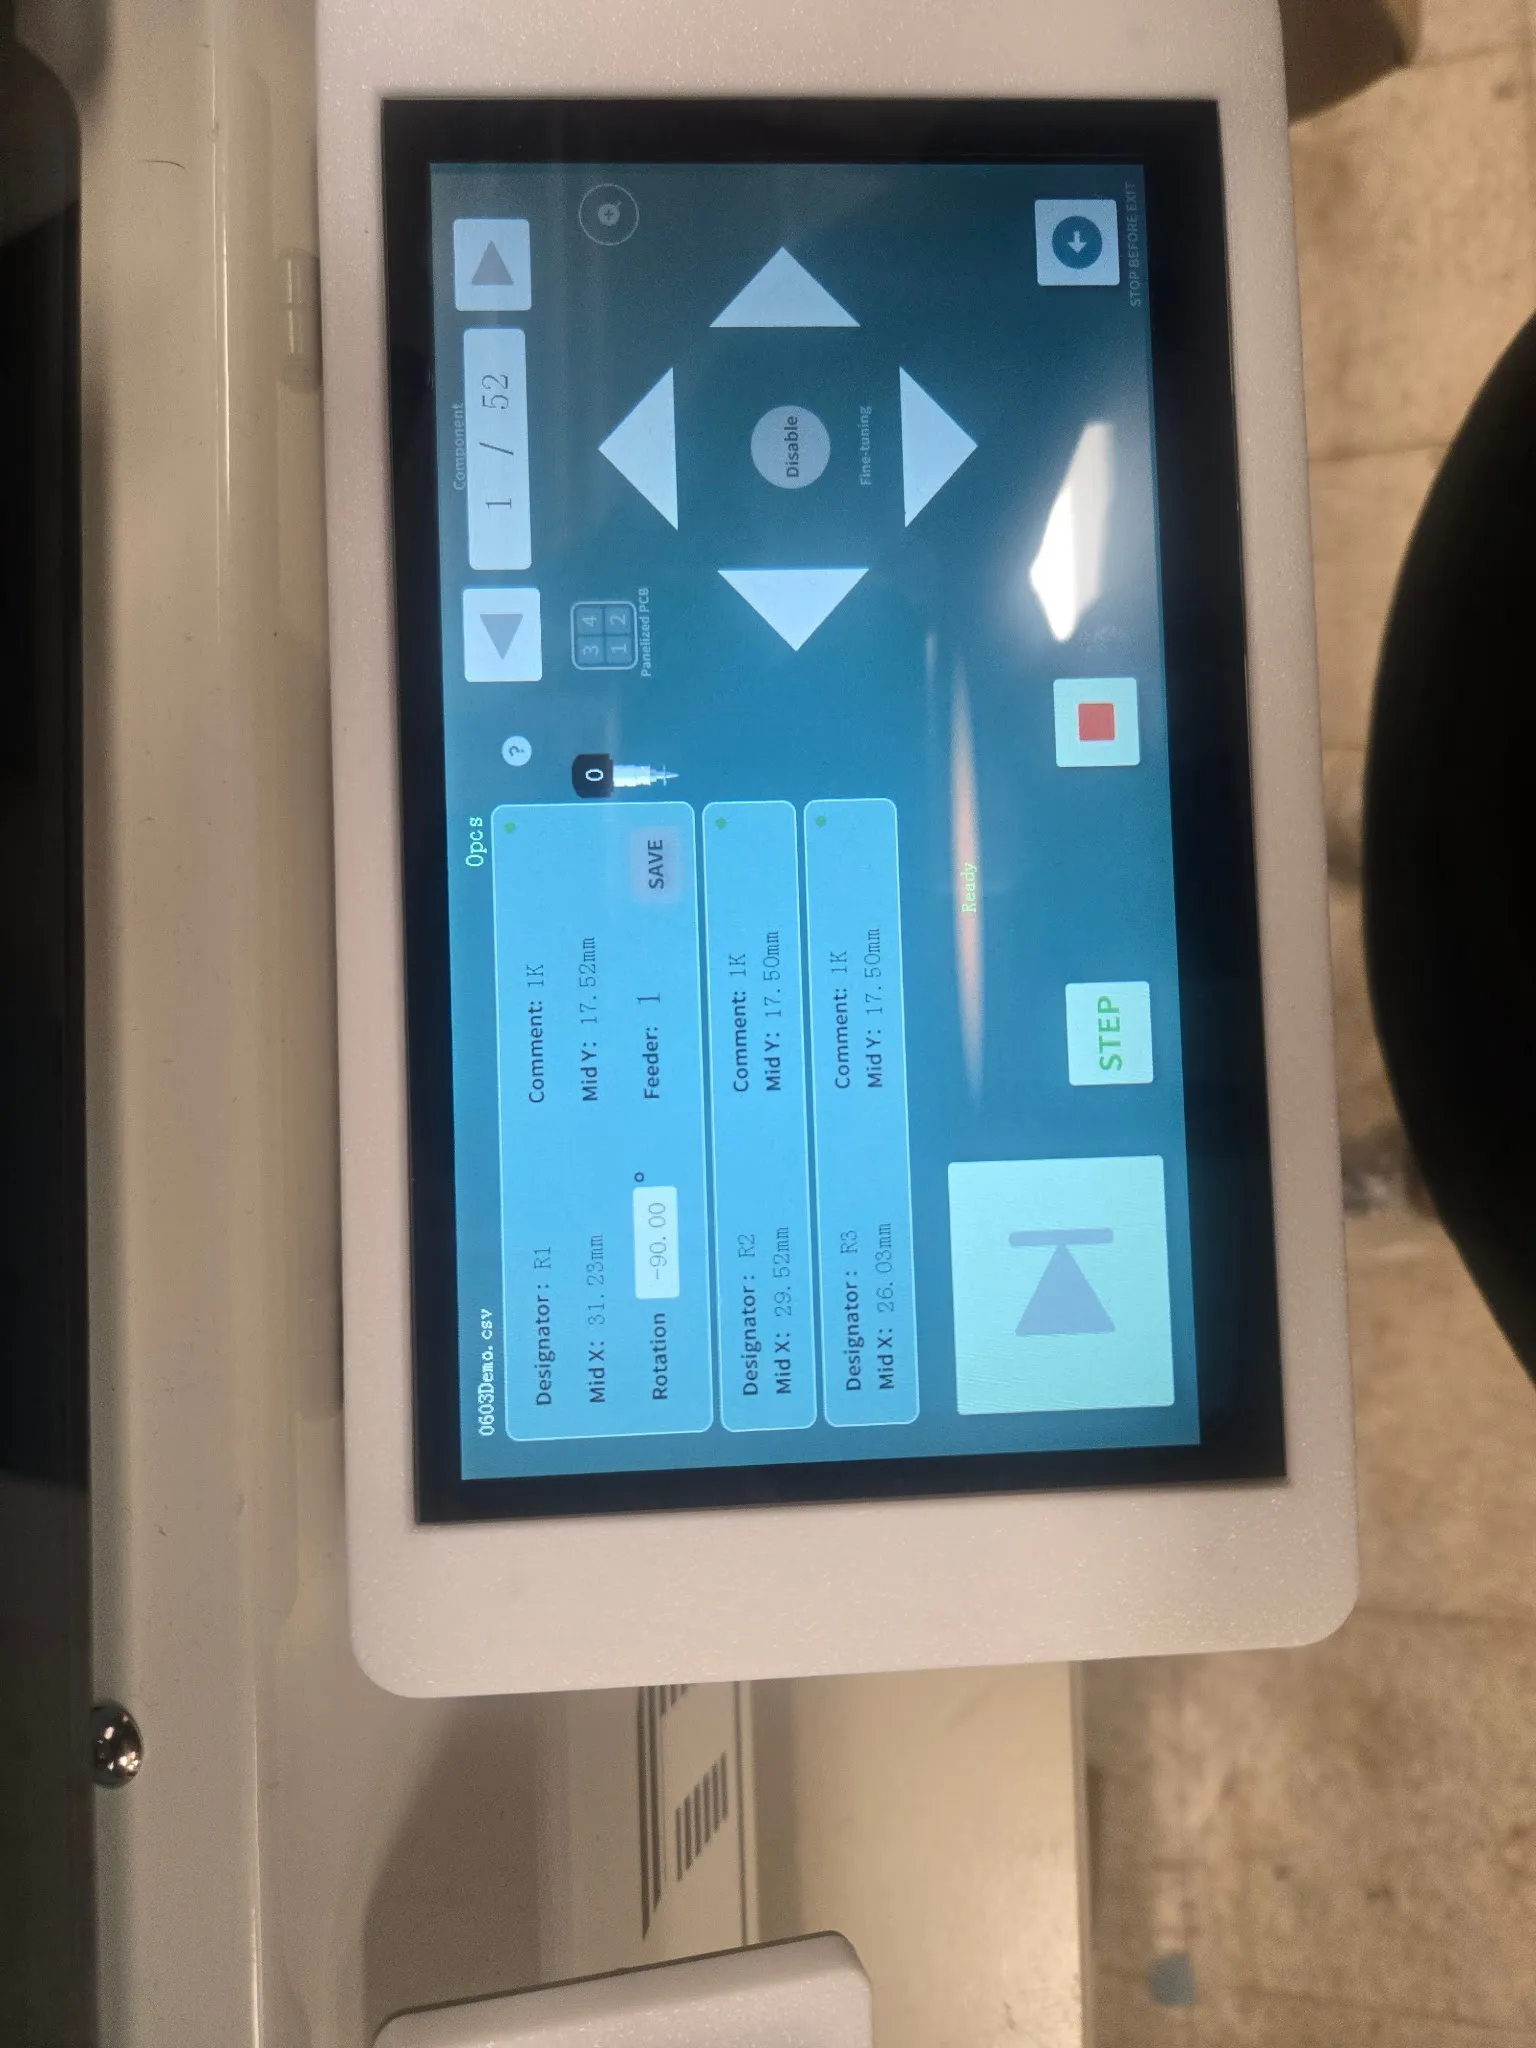
If needed, use Edit Component to confirm feeder mapping and key values before running.
-
Tap Mount, then place your PCB at the board origin (bottom-left reference screw) with the same orientation used in your design.
-
Position the magnetic board holder to secure the PCB.
-
Press Start to begin placement.
WARNING
Stay at the machine for the full run. If you notice unexpected noise or vibration, a jammed feeder, the head moving somewhere it should not, smoke, sparks, a burning smell, a frozen screen or a damaged power cable — tap Stop, keep your hands clear, and get a staff member. Never troubleshoot a running machine yourself.
- At Placement Complete, wait for the head to return to home before reaching inside.
Finishing up
Section titled “Finishing up”- Remove the PCB by the edges so wet solder paste placements are not disturbed.
- Inspect for missing, mis-rotated, or shifted components before reflow.
- Send the board to the reflow oven.
- Brush loose components off the bed — never compressed air or your breath, which blows parts into the machine’s lead screws.
- Return component reels to their moisture-barrier bags or storage bins.
- Exit on the touchscreen, then power the machine off.
- Report broken nozzles, feeder jams, crashes, or repeat placement errors to staff.
- Take your project and materials with you; the lab has no storage.
Common problems
Section titled “Common problems”The screen shows File Error when selecting a CSV. The file format does not match YY1 requirements. Re-export as CSV in mm, run it through the YY1 formatter, and verify header and column structure in YY1 CSV format (required).
A component is not being picked correctly. Check tape indexing first. Then confirm feeder mapping and nozzle suitability for that package. If pick failures persist, stop and notify staff.
Vision alignment warning appears during setup or run. Gently clean the vision area with a microfiber cloth and verify the board is flat and well lit. Re-run setup, then call staff if the warning remains.
Placed parts look offset on the board. Confirm board orientation at origin, re-check fiducial/edit screen values, and verify feeder assignments match the intended designators before starting the next run.
Comments
Something on this page wrong, missing, or not matching the machine in front of you? Say so here — comments are public and staff read them. Posting needs a free GitHub account, the same one the Edit page flow uses; if you already know the fix, editing the page is the faster route. Comments are readers talking to each other, not checked instructions — for anything urgent or safety-related, ask staff in the lab or on Discord.